
Happy Non-Denominational Gift Giving Season to All!
Tag: music
Me and Funky New Wave Seagull-Hatin’ Yoda have even more in common than me and Regular Yoda! ♬♫♪
So, this is a hella catchy song that I really love—
—but it also super-duper creeps me out, because it sorta seems like
- the speaker is a sociopath who
- is confessing to a crime in song. Like, I think the narrator of this song is maybe that realtor who had that woman chained up “like a dog” in a shipping container on his property in North Carolina. And finally, I’m a little worried that
- maybe this is Rick Springfield confessing in song—has anyone heard from Jessie’s girl lately? I mean, shit, do any of us even know her name‽
Anyway, still a catchy tune—apart from the weird little record-skip repeat at around 1:30, prior to diving into the B-section. I love the B-section and breakdown—especially because it then leads into, like, a “C” section(?) with a weird momentary Truck Driver’s Gear Shift and serviceable guitar solo—but that repeated bar near 1:30 has always sorta driven me nuts.
Anyway, enjoy!
#FACT: When sound and silence happen in a discernably orderly manner, they are musical
This is a fun little mechanical musical sequencer.
Keep watching and then look around you!
Shout-out to this tacky Canadian rapper with his NSFW music video about doing sex with ladies on his hoverboard…
…you and I don’t appear to really have much anything in common, m’man—apart for our mutual love for whatever the hell it is we each individually think of when we think of “Freedom”—but you are a human untroubled by any insecurities of any sort, and I applaud that.
The “Millennial Whoop” and the Formula for Comfort Formulae
I’m interested in artistic formulea of all stripes, so my ears perked up when I stumbled across this blog post exploring why it is that every pop song I hear as of late seems to feel the same, even when they sound totally different. The key: A little earwormy melodic alternation embedded into the hook. Here’s the article’s kick-out—although the whole thing (which is rife with video examples) is well worth your time:
[T]he Millennial Whoop evokes a kind of primordial sense that everything will be alright. You know these notes. You’ve heard this before. There’s nothing out of the ordinary or scary here. You don’t need to learn the words or know a particular language or think deeply about meaning. You’re safe. In the age of climate change and economic injustice and racial violence, you can take a few moments to forget everything and shout with exuberance at the top of your lungs. Just dance and feel how awesome it is to be alive right now. Wa-oh-wa-oh.
Having read this, I wondered how persuasive such a simply piece of patterning might be. So, in five minutes I sketched out this little tune and, whaddya know, it sounds like the outro of basically anything I’ve stumbled across while tuning across the dial during the last several long summer car trips:
For the curious, there’s literally nothing going on in this song: The left hand is just a straight C Major chord alternating with whatever you call that lazy F Major where, instead of actually moving your hand up, you just skooch your thumb and index fingers up one white key each, so that you pick up F Major’s F and B while keeping C anchored as the bottom note (maybe that’s an “inversion” of F Major?) The right hand, as per the “Millennial Whoop” formula, is alternating between the G and E two octaves up—i.e., the V and III in a progression where C is the root (i.e., I). The lyrics (which, depending on your speakers, might be hard to hear without headphones; I’m shit at mastering) are just whatever popped into my head, and the whole thing was recorded using my cellphone. The only “studio magic” (done in Garageband, and largely without any digital pixie dust) is “doubling the vocals” (see below—which is an excerpt form my book Junkyard Jam Band )—especially important in this instance because 1) I can’t sing for shit (which double-tracking tends to obscure) and 2) the mic on my cellphone didn’t pick up my voice particularly clearly, on account it was sitting on top of my keyboard’s speaker. Even if it had caught my singing, I likely would have doubled the vocals anyway (which are actually quadrupled by the end—listen with headphones, and you’ll hear two extra voices, slathered in “chorus” effect, that come in on the second round of Oh-ee-oh-ee-oh-ohs), since that sorta lush studio overkill is baked into this running-’til-the-break-of-dawn! summer-hit genre.

Continue reading “The “Millennial Whoop” and the Formula for Comfort Formulae”
Project: The “Non-Violins” Synthamajig
 Here’s a little something I cooked up while special-guesting at Motor City Steam Con, July 22–24, 2016:
The “Non-Violins” Synthamajig:
Here’s a static view, front and back:


So what’s going here? Some of it is standard steampunk greebles (e.g., that faux wind-up key, the old vacuum tube being lit with a modern LED mounted behind it, some obtuse knob and mounting hardware choices), but the guts are a combination of totally legit early prototype circuits from my book (e.g., a four- step version of the Bleepbox Sequencer, of which only three of the steps can be pitch-controlled) and simple versions of a few others I hacked together on the spot (the voice is a stripped-down Single Chip Space Invader Synth driving a simplified Dirty-Cheap Amp).

Why did I do this? ’cause Emmy Jackson asked me to. Emmy is a really swe ll guy, and did me huge solids at both Motor City Steam and Penguicon (where he both handled book sales for me and the other authors on hand, and offered a safe space for my son if he should lose track of himself or get freaked out). He showed up at Motor City Steam with four rejected violin bodies, on
  the condition that I rework at least one to fit in with his Dieselpunk aesthetic. I gladly gave it my damndest (another instrument from this same weekend, the Diddley Fiddle, is still in development—as is, it’s a fine lil diddley bow, but damned if I don’t want it to be at least a tad more electromechanically rad-as-hell).
Here’s some video of me presenting the Non-Violins Synth to EmmyJ at Motor City Steam Con:

Drawing with Sound on an Oscilloscope
No CGI, no digital effects, no computer even; just some electrical testing equipment and an audio recording. Pretty neat and a lot of fun to watch—so neat and fun that I was, in fact, pretty dubious at first. So I borrowed an oscilloscope from my local public library and tried it out—AND IT WORKED!
Here’s Jerobeam Fenderson’s explanation of the effect, and another article with several neat videos.
Here’s Fenderson’s older “Drawing Mushrooms” video, which is the one I tested myself:
Metal-on-Metal: Convert an Old Shovel into a DIY Electric Guitar
I love watching Rob Scallon rock out on a shovel guitar. FYI, this is a totally doable afternoon DIY project for any of you (yes, even you!) or the bored teen in your life. You can build something just like this (or a hockey-stick bass, an electric broomstick banjo, an axe ax—you get the gag) using the methods laid out in the “$10 Electric Guitar” project in my first book (click here now to get a FREE copy of that project—and, if you’re near Metro Detroit in July, you can come to Motor City Steam Con where I’ll be running a workshop on electric-guitarifying stuff).
Wnat more DIY musical shenanigans? I’ve got a whole new book of crazy music projects.
Josh Burker’s Scratchbox Turntable
Josh Burker—an early reviewer of my latest DIY book, Junkyard Jam Band—didn’t just build a sweet-ass Scratchbox (although he did do that)
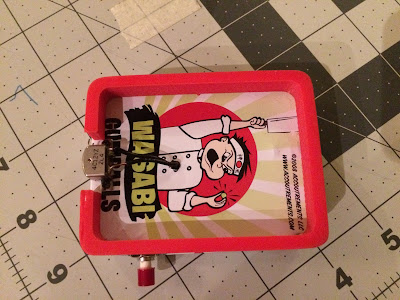
Josh went one better and adapted it to a hella rad turntable interface.
Oh.
My.
Daaaaaaaamn!
I love this sooooo much! Check it out:
Wanna build your own Scratchbox (or Scratchbox-inspired awesomeness)? Check out my full illustrated Scratchbox build instructions on the MAKE magazine website.
For a brief history of the credit card magstripe that makes this all possible, check out the first bit of this Planet Money podcast: Episode 695: Put A Chip On It : Planet Money : NPR:
(thx Josh!)